Rainbow Analysis
Adapted from Project Astro Activities.
- Full Activity (PDF)
- Electromagnetic Spectrum handout (PDF)
- Example Element Spectra (PDF)
- YouTube video about building this type of spectroscope
Summary:
Students are introduced to the scientific tool of spectroscopy. They each build a simple spectroscope with which they can examine the light from different light sources, particularly the Sun (if logistically feasible) and artificial lights (fluorescent or sodium lamps, discharge lamps, or whatever is available locally). Students compare the continuous spectrum of incandescent lights and the solar spectrum (which appears continuous at the resolution typical of plastic diffraction gratings) with the clear spectral lines of the fluorescent or sodium room lights and discharge lamps show. They learn how the spectral "fingerprints" of each particular element help astronomers recognize the presence of specific elements in distant astronomical objects. Students are also introduced to the broader electromagnetic spectrum beyond what is visible with our eyes. They discuss how scientists observe distant objects using multiple wavelength bands to gather different types of information about those objects.
Audience:
A group of 20-25 students (grade range 5th-8th)
Objectives:
- Understand that light is composed of different wavelengths of energy, including many we cannot see with our eyes
- Recognize that light can be separated by wavelength, which, in visible light, is equivalent to color
- Build an astronomical tool, a spectroscope, to study light
- Learn that the spectra of elements and molecules each have a unique "fingerprint" of lines at different wavelengths
Materials:
- Empty paper towel tubes (1 per student)
- Aluminum foil (2 pieces of about 4 x 4 inches and 2 strips of about 1 x 3 inches per student)
- Diffraction grating (approximately 1 inch square of material per student)
- Masking tape
- Poster or handout about the EM Spectrum
- Example spectra
- Incandescent light bulb
- Element discharge lamps (optional; examples: H, He, O, N, Ne, H2O, and CO2)
Preparation:
- Prepare parts of spectroscope: ~30 minutes
Cut pieces of foil (2 pieces of 4 x 4 inches and 2 pieces of 1 x 3 inches per student) and diffraction grating (a 1-inch square of diffraction grating per student). Exact measurements are not at all necessary. Collect one paper towel tube for each student. You can put each kit in a Ziploc bag.
Handle the diffraction grating carefully with clean hands (or gloves), touching only the edges. Avoid smudges and fingerprints, which will negatively affect the function of the spectroscope.

- Build example spectroscope(s): ~15 minutes
This accomplishes two things. First, it makes the activity much easier for when you go through it with students. Second, it can help the students to see an example of a spectroscope that is already assembled.
- Darken the room: ~10 minutes (depending on the room)
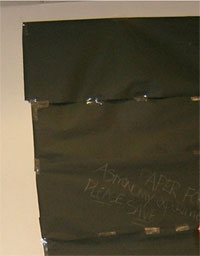
The room should be capable of going from brightly lit to dark so that both the overhead fluorescent lamps and the narrow discharge lamps can be seen effectively. Sometimes this means lights or light leaks must be covered. Dark black plastic trash bags and duct tape have proved useful for this.


